Stripping the MX5 Part 5.2: Rear Subframe (Hubs / Differential)


With the rear subframe removed I thought it might be easier separating the differential from the subframe by having more space to work with. However the biggest mistake I made was not loosening the axle nuts first even
 before I removed the transmission / propshaft. It would have saved a lot of problems if I had the car in gear, brakes on and the weight of the car holding it still.

I started by hammering out the indentation on the nut that stops it coming loose while driving. The first pathetic attempt was to stand of the tyre and turn the nut using the breaker bar with 29mm deep socket. The tyre simply turned with me on it.

The next attempt was to wedge a flat chisel between the brake pads and disc as well as clamping them down. No success the wheel just turned again with the force of the breaker bar. The next step was going to be to connect the brake line back up and refill the brake fluid, step on the brake pedal to hold the wheels. However I had one more idea before I did.


I decided to try one more thing. I removed the wheel, brake caliper, brake pads and disc. I then used bricks and bits of wood to support the bottom wheel two studs. Then used a 7ft long piece of scaffolding tube with a flattened end and wedged it between the top two studs. I left the lug nuts on the studs to protect the threads. I wasn't too worried about bending the studs as they normally take the weight of the car as well as being able to cope with acceleration / deceleration, cornering, etc. The idea was with each stud wedged in place they would be under pressure and prevent the wheel hub rotating when I turned the axle nut.


I used a 6ft tube on the end of the breaker bar and with that amount of leverage and a good push the axle nut came off fairly easily.


I removed the top bolt on the wheel hub that goes through the top wishbone.


Followed by the lower bolt that runs through both bushes of the lower wishbone. Then I used a mallet to tap the spindle and the back of the hub and eventually it came free.

I attempted the same removal method for the axle nut on the other side with no luck. Even with the huge 6ft and 7ft leverage the breaker bar it didn't budge, it was physically bending. I wasn't pushing too hard as I didn't want to find out which would snap first the breaker bar or the axle nut.

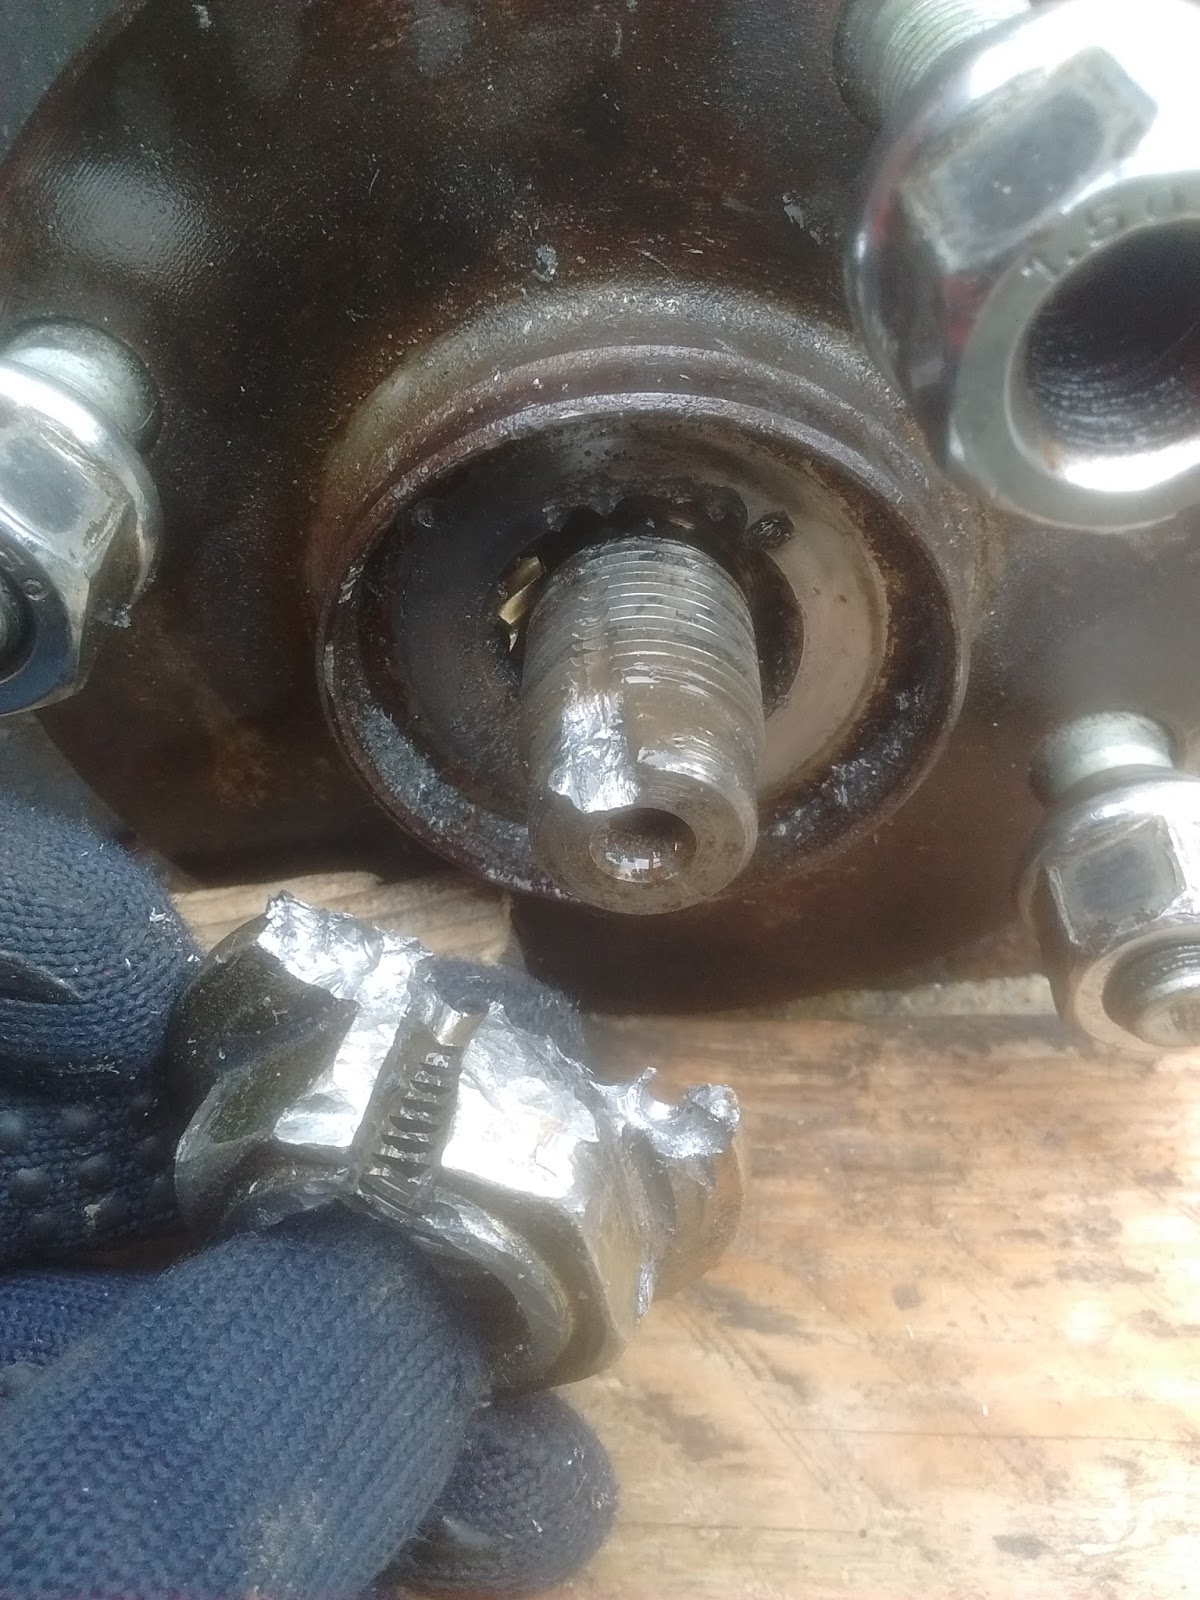
I decided the that I would attempt to cut a groove into the axle nut to relieve some of the pressure. I could then just buy another axle nut rather than chopping the spindle off and buying a new driveshaft. I first cut off the shroud on the nut in case the indentation wasn't fully hammered out, still didn't move. I continued with a 22mm dremel blade cutting across the flange and down the middle however I could only reach so far due to lack of workable space. I then continued with a drill, I tried to be careful not to damage the threads on the spindle. Once I had gotten so far I tired again with wedging the hub and using the breaker bar with the tube. Success, with the nut now free time to order a new one. There wasn't much damage to the spindle thread but the hub wasn't so lucky. I'd drilled a little to deep in some place but it was really only surface damage which could be easily filled and didn't affect it's ability to work. 


With both rear wheel hubs removed I loosened the bolts joining the subframe and differential together. I took one of the lower wishbones off and dragged the differential out of the side of the subframe.


Stripping the MX5 Part 5.1: Rear Subframe

                                                                                                                                         
I needed the differential for the kit car build, I thought it would be simpler to just remove the entire rear subframe instead of working under the car to get it out. Removing it is very straight forward, having already removed the PPF there are only three nuts on each side and then two nuts on each shock strut. The nuts under the car were pretty tough to remove, a combination of heat, penetrating oil and a breaker bar helped get them off.  

With the subframe loose I jacked up the car slowly, gradually revealing the separation gap  between the body and subframe. I kept jacking up the car incremental on each side and supporting the body with bricks underneath as I went along. Eventually the gap was big enough for the subframe to be simply rolled out underneath.


The shock absorbers needed to be removed first to allow the subframe to be rolled out, as well as disconnecting the handbrake cable and rear brake line.


I began pushing the subframe out until it was completely free. I had to support the front of it as it would sag forward due to it being front heavy. 


With the subframe now free from under the car I could continue stripping it easily without any space restriction. 

Stripping the MX5 Part 4.2: Removing the Engine 

                                                                                                                   
I'd removed pretty much everything that I needed to get the engine out. I unbolted the bonnet, which I'd kept on to help keep everything dry. I didn't need the front of bumper support so that was chopped off to provide more work space. It also meant I didn't have to lift it up and over, I could lift it free of the mounts and pull it straight out. 


In an attempt to save money I used the seat belts to lift the engine. I would have been a lot easier using proper lifting chain and a load leveler but the belts and rope worked fine. Anyway I unbolted the two nuts under the front subframe and started lifting slowly, checking the clearance regularly.


With the engine and transmission clear of the car I could drop it temporarily in the Haynes Roadster chassis on wood and bricks till I got around to making the mounts. Until then I would continue to strip the MX5.

Stripping the MX5 Part 4.1: Removing the Engine 

                                                                                                                 
The engine was almost ready to be removed first I had to disconnect everything underneath the car that run to it. I pushed the cables down from the parcel shelf to the bottom of the car, which normally run to the battery. I followed the cables along Power Plant Frame (PPF) unclipping and unplugging as I went.

I moved onto the exhaust pipe system, which is made up of four main sections: the manifold, the down-pipe, CAT and the muffler / silencer with the tip attached.


Cardigan CORGI gas approved engineer.


The muffler section came off easily by unhooking hangers and removing the two bolts on the flange connecting to the CAT. However removing the CAT wasn't as easy, the two flange bolts connecting it to the down-pipe were badly seized. A bit of penetrating oil, time and some force with a breaker bar they eventually came off. 

Things got worse with the down-pipe flange connecting to the manifold. One of the bolts came out but the other turned out to be a nightmare. The bolt went through a bracket connected to the transmission housing, through the down-pipe flange and then through the manifold flange. The head of the bolt was badly corroded when I tried to remove it with a socket set it came out slight then simply crumbled away and quickly became rounded off. Unfortunately the area around the bolt was too tight to fit a drill in, which meant that drilling out the bolt was not an option. 

Cutting was the only real option, but I didn't have anything that would be able to fit in the tight space and cut the nut off. I also didn't want to have to cut through the flange as I needed the manifold for the build and I didn't want to have to repair it later. The only thing holding the exhaust to the engine was a bracket connected to the transmission housing. The only thing I could fit in the space was a junior hacksaw. I must have spent nearly half an hour cutting through the bracket. The limited space meant that only about five of the teeth were actually cutting.

Eventually it came free but the manifold and down-pipe were still attached. I managed to drag the manifold up and rotate it to expose the troublesome bolt. I cut it off finally separating the two sections, headache over for now.


I'd taken off front brace bar and started removing the PPF. I used my book Mazda MX-5 Miata 1.8: Enthusiast's Workshop Manual to help me. Also a really useful video on removing the PPF on youtube: Miata How to: Remove Power Plant Frame (PPF).


The bolts attached to the transmission weren't easy but they came out. The next headache started with the bolts attached to the differential. The bolt closest to the front was difficult but the rear one was impossible. I had managed to loosen it with a breaker bar and continued to turn it until I realised it was just spinning. The mushroom shaped nut on the top had splines and they weren't engaging. I was afraid I might have stripped them making it almost impossible to remove.  I managed to fit an F style clamp in there and clamp down onto the nut. This helped stop it spinning enough to be able to remove the bolt. Examining the nut revealed that some of the splines had been damaged from trying to remove it.

Next was removing the PPF from the car. I used a pry bar to free it from its mounting points. I had to wiggle it around propshaft, which wasn't easy with the lack of working room.


With the PPF gone the only thing left was the propshaft. All four bolts required penetrating oil, heating with a propane torch and a breaker bar. It was unbolted but still attached by rust, one hit with a block of wood and lump hammer and it was free.

Finally the engine could be removed.

Brief Protection

                                                                                                                                                                    Before I took the engine out I noticed that the chassis had some surface rust. So I decided to deal with it before continuing with stripping the MX5. I made the decision to use Loctite Rust Remedy because as I thought it would be the quickest and easiest method to protect from rust. I split the work into 3 stages and brought 3 bottles of the stuff.


I started at the front by using a wire wheel brush to remove the surface rust followed by a quick rub down. Then I brushed on the rust converter, I starts as a milky grey colour and gradually dries to a blueberry colour. Once everything fits and is fully welded the chassis I'll fully spray paint the entire frame.