Stripping the MX5 Part 5.2: Rear Subframe (Hubs / Differential)
With the rear subframe removed I thought it might be easier separating the differential from the subframe by having more space to work with. However the biggest mistake I made was not loosening the axle nuts first even before I removed the transmission / propshaft. It would have saved a lot of problems if I had the car in gear, brakes on and the weight of the car holding it still.
I started by hammering out the indentation on the nut that stops it coming loose while driving. The first pathetic attempt was to stand of the tyre and turn the nut using the breaker bar with 29mm deep socket. The tyre simply turned with me on it.
The next attempt was to wedge a flat chisel between the brake pads and disc as well as clamping them down. No success the wheel just turned again with the force of the breaker bar. The next step was going to be to connect the brake line back up and refill the brake fluid, step on the brake pedal to hold the wheels. However I had one more idea before I did.
I used a 6ft tube on the end of the breaker bar and with that amount of leverage and a good push the axle nut came off fairly easily.
Followed by the lower bolt that runs through both bushes of the lower wishbone. Then I used a mallet to tap the spindle and the back of the hub and eventually it came free.
I attempted the same removal method for the axle nut on the other side with no luck. Even with the huge 6ft and 7ft leverage the breaker bar it didn't budge, it was physically bending. I wasn't pushing too hard as I didn't want to find out which would snap first the breaker bar or the axle nut.
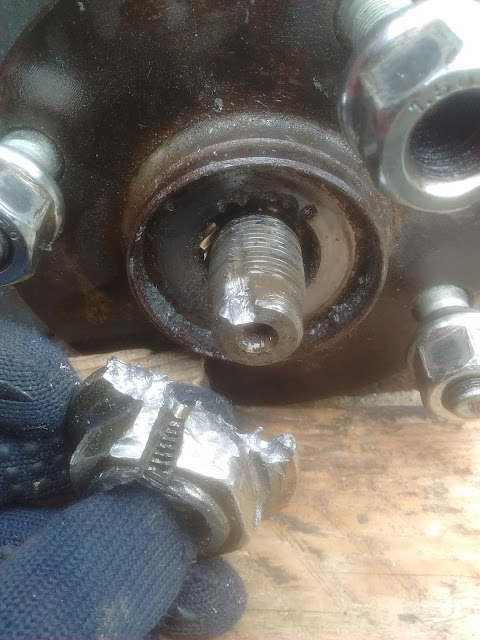
I decided the that I would attempt to cut a groove into the axle nut to relieve some of the pressure. I could then just buy another axle nut rather than chopping the spindle off and buying a new driveshaft. I first cut off the shroud on the nut in case the indentation wasn't fully hammered out, still didn't move. I continued with a 22mm dremel blade cutting across the flange and down the middle however I could only reach so far due to lack of workable space. I then continued with a drill, I tried to be careful not to damage the threads on the spindle. Once I had gotten so far I tired again with wedging the hub and using the breaker bar with the tube. Success, with the nut now free time to order a new one. There wasn't much damage to the spindle thread but the hub wasn't so lucky. I'd drilled a little to deep in some place but it was really only surface damage which could be easily filled and didn't affect it's ability to work.
With both rear wheel hubs removed I loosened the bolts joining the subframe and differential together. I took one of the lower wishbones off and dragged the differential out of the side of the subframe.


No comments:
Post a Comment